
Z-Image Turbo Prompting Guide: Formula, Tips, and 5 Example Prompts
You type “1girl, solo, masterpiece, best quality” into Z-Image Turbo and wonder why the output looks generic. That prompt syntax was built for Stable Diffusion. Z-Image speaks a different language entirely.
Under the hood, it’s a 6-billion-parameter single-stream diffusion transformer (S3-DiT) that processes text and image tokens in one unified sequence. Instead of parsing comma-separated tags, it reads your prompt the way a human reads a sentence.
Below: what the model expects, a reusable prompt formula, and five prompts you can paste directly into a deAPI API call.
Why Old Prompting Habits Break Here
If you’ve spent months fine-tuning your Stable Diffusion workflow – tag-style syntax, heavy negative prompts, guidance scale tweaking – Z-Image Turbo will feel unfamiliar. Three things are fundamentally different.
The model understands sentences. Z-Image was trained on natural language captions in English and Chinese simultaneously. Write a description, not a shopping list.
Step count matters less than you’d expect. The Turbo variant was distilled for 8 sampling steps – that’s the production sweet spot. Cranking it to 40 can introduce grid-like artifacts instead of improving quality. Use 4 steps for quick A/B testing, 8 for final output.
What about guidance scale? You don’t touch it. The Turbo distillation (Decoupled-DMD) baked guidance directly into the weights, so your prompt does all the steering.
The 6-Part Prompt Formula
Every strong Z-Image prompt follows the same skeleton. You don’t need all six parts every time, but knowing the full structure helps you diagnose weak results.
- Subject – who or what, with specific details. Age, clothing, hair, accessories. For multiple subjects, describe each one separately.
- Scene – where it happens. Z-Image has strong geographic knowledge, especially for East Asian and European locations. “A narrow Shibuya backstreet at midnight with steam rising from a ramen shop” gives a more coherent output than “Japanese street at night.”
- Composition – shot type, framing, aspect ratio. The model responds to camera language: “medium shot,” “close-up,” “wide-angle.” Specify a focal length if you want control – “85mm f/1.4” produces a different image than “24mm f/2.8.”
- Lighting – the single variable that affects Z-Image output the most. “Soft diffused overcast light” and “three-point studio lighting” produce dramatically different results. Name the source, its direction, its quality.
- Style – pick ONE dominant medium. “Analog film photograph” or “cel-shaded anime illustration” or “oil painting with visible brush strokes.” Mixing three styles at once confuses any model.
- Constraints – what must NOT appear. Since negative prompts work differently here (more on that below), embed your constraints directly: “no watermark, no extra text, correct anatomy.”
The sweet spot is 30-120 words of structured, natural-language description.
Negative Prompts: Less Is More
The vanilla open-source pipeline ignores negative prompts entirely because guidance is set to zero. Through deAPI’s pipeline, negative prompts ARE honored – but they work differently than in SD 1.5.
The rule: be specific, be minimal. Two or three concrete defects you actually see in your generations. “Extra limbs, warped text” is useful. The classic “low quality, blurry, bad anatomy, worst quality, jpeg artifacts, ugly” wall of text actively hurts – it distracts the model without improving output.
One important edge case: if you need to forbid Chinese characters from appearing (or vice versa), put that instruction in the POSITIVE prompt. “English text only, no Chinese characters on the sign” works better as a positive direction than a negative constraint.
The Bilingual Superpower
Most developers skip this entirely. Z-Image renders CJK characters and Latin text legibly in the same image. Ask FLUX to render kanji and you get visual noise – Z-Image reads both scripts and produces clean typography.
Think product labels mixing Japanese and English, or neon signs with Chinese and Latin characters. If your app serves multilingual markets, this is the reason to pick Z-Image.
To use it, put the exact text you want rendered in quotes within your prompt: the sign reads "夜市 / NIGHT MARKET". Describe the typography separately – “bold red neon characters on top, thinner English font below.” The model handles both scripts with consistent rendering.
5 Prompts You Can Copy Right Now
Each prompt targets a different use case. All are tested at 8 steps, 1024×1024 resolution.
1. Editorial Portrait
A quiet editorial portrait of a 28-year-old Japanese woman with short black bobbed hair and subtle freckles, wearing a beige oversized wool coat over a white turtleneck, standing in front of a minimalist concrete wall in Tokyo’s Aoyama district during a drizzle, soft diffused overcast light, raindrops on her coat shoulders, shot on a Sony A7R IV with 85mm f/1.4 GM, shallow depth of field, muted cool color palette, Fujifilm Pro 400H film emulation, calm contemplative mood.
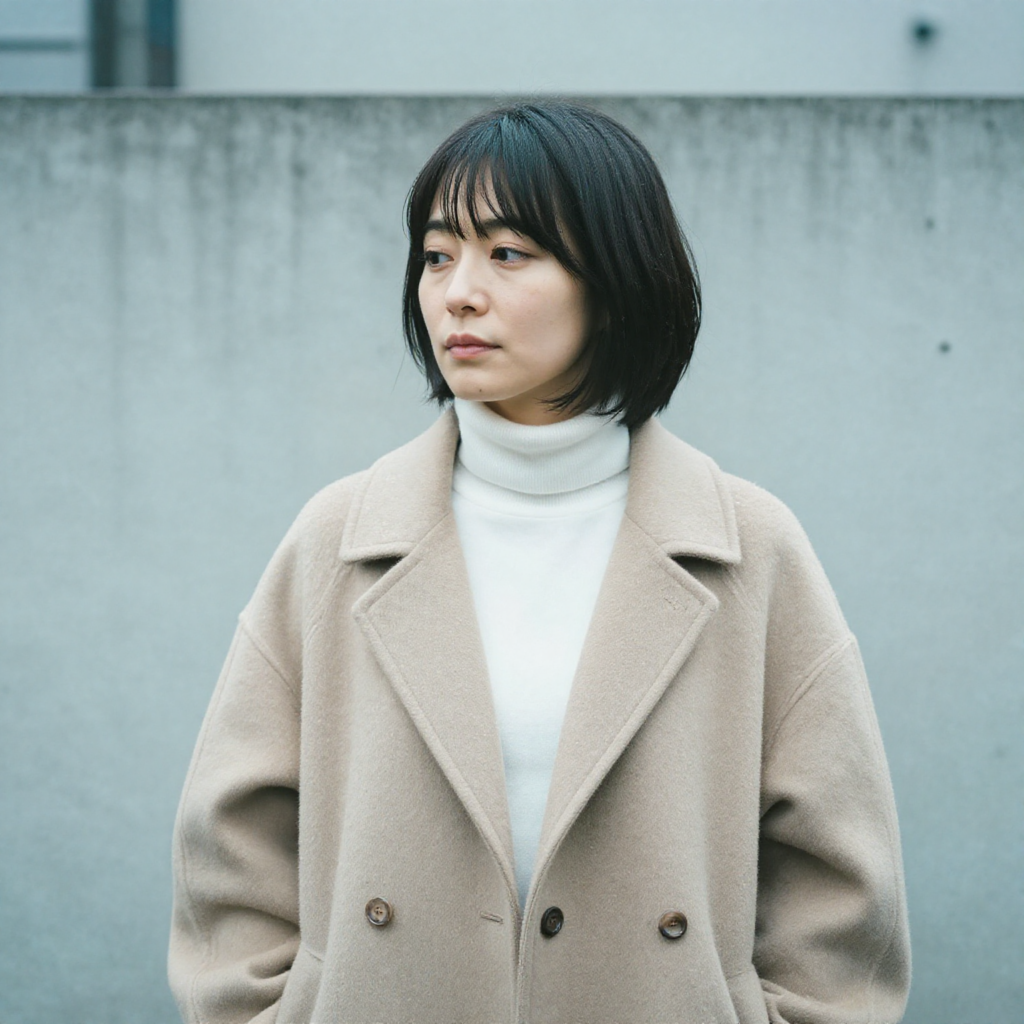
Why it works: Naming a specific camera body and film emulation anchors the entire color palette. The weather description (“during a drizzle, raindrops on her coat”) gives Z-Image atmospheric cues it handles exceptionally well.
Try changing: Swap “Fujifilm Pro 400H” for “Kodak Portra 800” to shift from cool muted tones to warmer grain.
2. Product Shot with Bilingual Label
Commercial packshot of a premium matcha tea can: cylindrical brushed aluminium with a minimalist emerald-green label that reads “UJI MATCHA 宇治抹茶” in mixed Japanese kanji and Latin typography, slight condensation droplets on the surface, placed on a polished dark walnut wood surface, two scattered bamboo whisks and a ceramic chawan bowl half filled with bright-green matcha foam to the left, soft overhead softbox light with a golden rim light from upper-right, clean shadow, neutral medium-grey gradient background, shot on Phase One IQ4 with 80mm macro at f/9, commercial food photography.

Why it works: This one tests Z-Image’s strongest differentiator – bilingual text rendering. The kanji 宇治抹茶 and Latin “UJI MATCHA” appear legibly on the same label. Most open-source models fail this test completely.
Try changing: Replace the product with your own – the formula (object + surface + props + lighting + camera) transfers directly to any packshot.
3. Social Media Banner (16:9)
A wide cinematic panorama of a lone photographer standing at the edge of a volcanic black sand beach in Iceland, dramatic basalt sea stacks rising from the ocean in the midground, white waves crashing against dark rocks, overcast silver sky with a single break of golden light on the horizon, shot on 24mm wide-angle lens, f/8, deep depth of field, desaturated cool tones with warm highlight accent, editorial landscape photography.
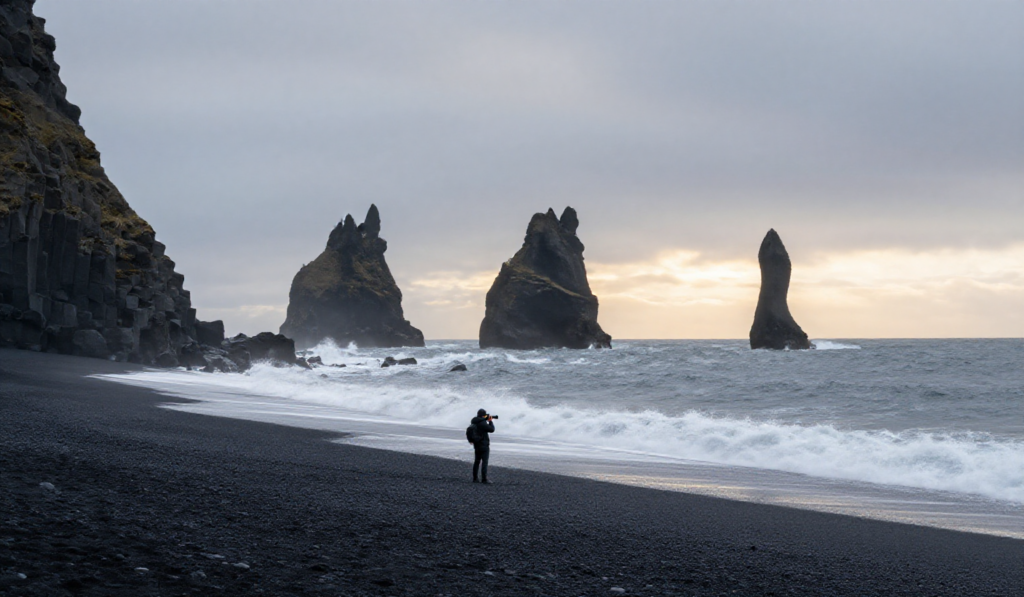
Why it works: The 24mm wide-angle instruction combined with “deep depth of field” tells the model to keep the entire scene sharp – critical for banners where foreground and background both matter. Z-Image handles geological textures (basalt, wet sand, ocean spray) with strong detail. Run this at 1536×640 for a true cinematic panorama.
Try changing: Set resolution to 1280×720 for a standard 16:9 YouTube thumbnail, or 720×1280 for an Instagram Story.
4. Neon Sign with Bilingual Text
A rainy Shanghai backstreet at midnight, a vertical neon sign hanging from a brick wall, the sign glows with bold red-and-pink characters “夜市 / NIGHT MARKET” – Chinese characters on top, English translation below in thinner neon tube font, reflections on wet pavement, cinematic film grain, shallow depth of field 35mm f/1.4, muted cyberpunk tones, moody atmospheric haze, a silhouetted passerby walking away on the right, Wong Kar-wai inspired color palette.
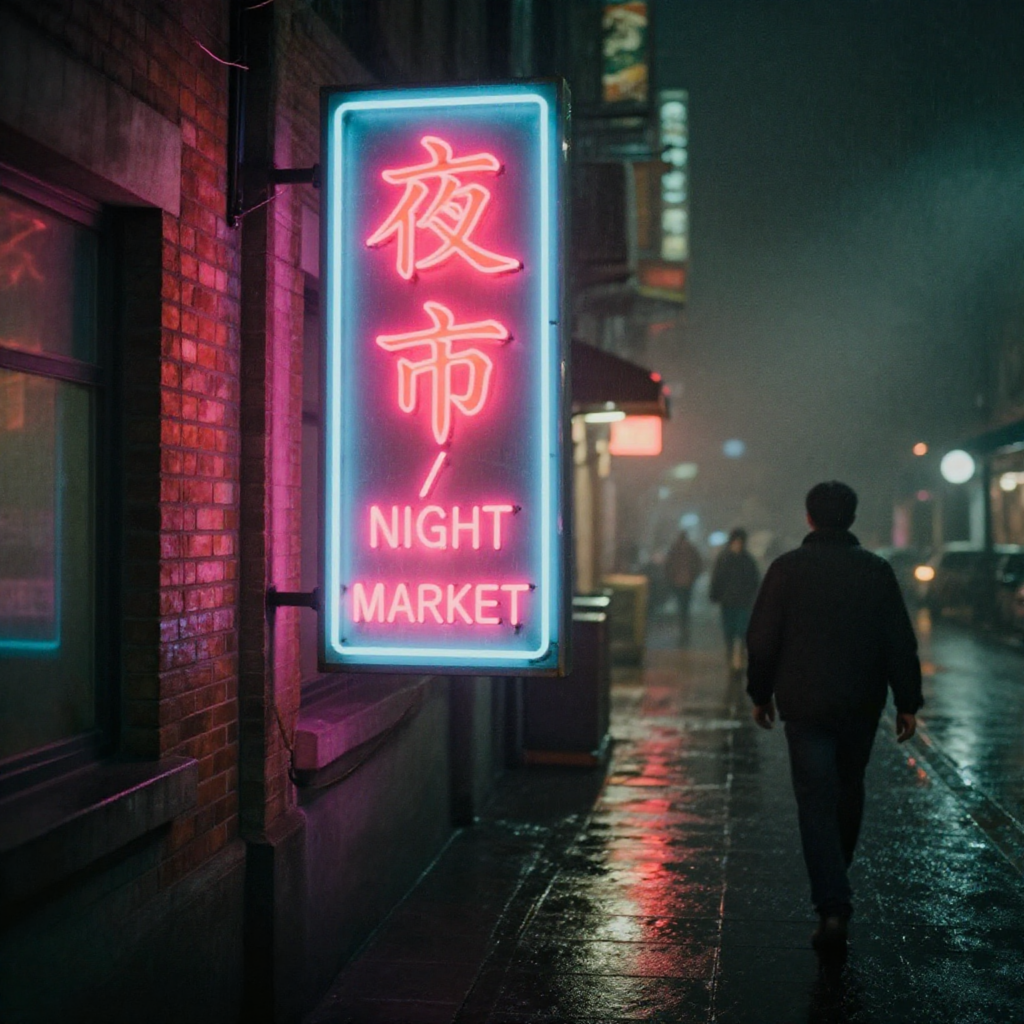
Why it works: Two scripts, two typographic styles, rendered consistently in one image. The “Wong Kar-wai inspired color palette” is a surprisingly effective shorthand – Z-Image understands directorial styles as color and mood references.
Try changing: Replace “Shanghai” with “Taipei” or “Hong Kong” for distinctly different architectural backgrounds while keeping the same neon aesthetic.
5. Anime / Illustration
A lush cel-shaded anime illustration in the style of KyoAni studio productions: a high-school girl in a white summer uniform standing on a railway overpass at golden hour, looking down at the train tracks below, wind blowing through her long chestnut hair, warm backlight rim on her silhouette, cotton clouds in a gradient orange-to-pink sky, hand-drawn details, soft color bleeds, centered waist-up composition.
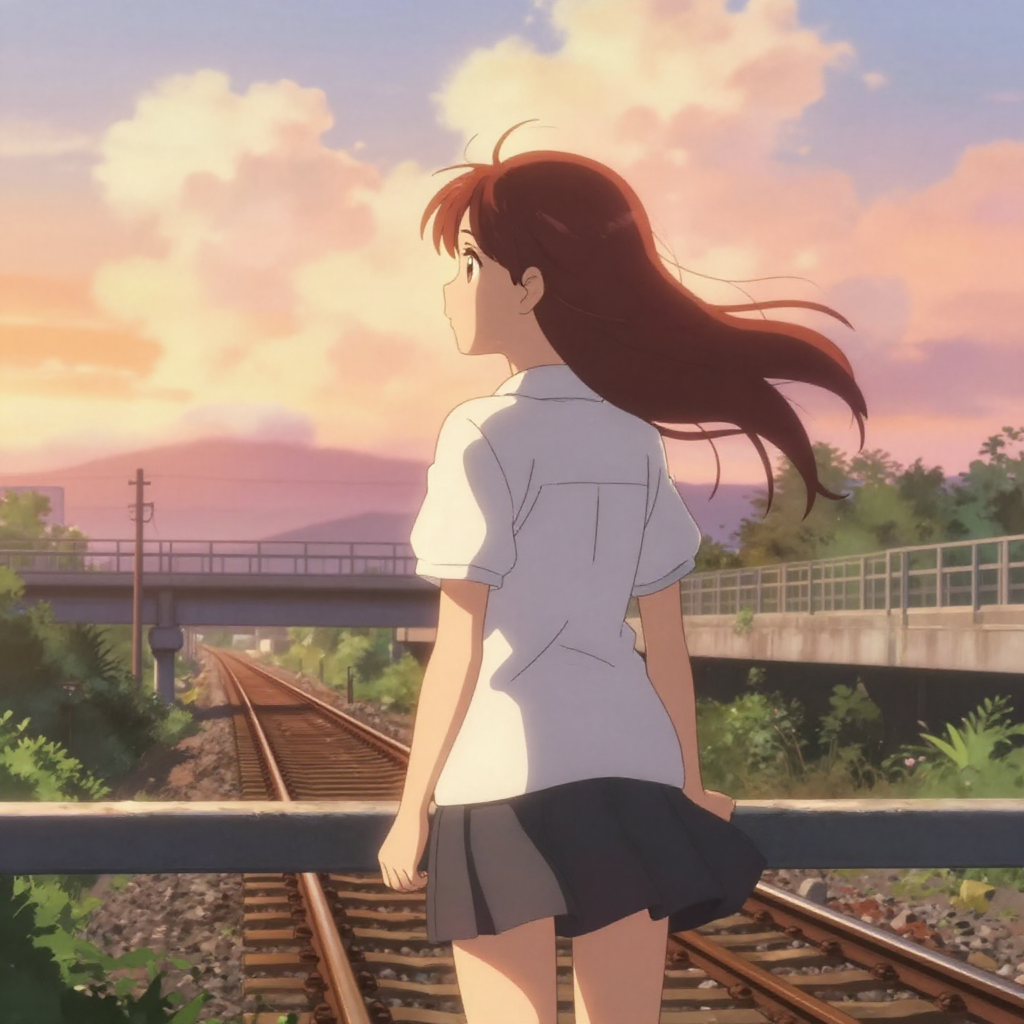
Why it works: Naming a specific studio style (“KyoAni”) sets a precise aesthetic without copying a single title. The atmospheric cues – golden hour backlight, wind in hair, gradient sky – are iyashikei hallmarks that Z-Image interprets with strong fidelity. This prompt also demonstrates that Z-Image handles stylized illustration as well as photorealism.
Try changing: Swap “KyoAni” for “Makoto Shinkai” to get more dramatic lighting and saturated skies, or “Ghibli-inspired” for softer, painterly linework.
Run It Through deAPI
Generate an image with a single API call:
curl -X POST <https://api.deapi.ai/text-to-image> \\
  -H "Authorization: Bearer YOUR_API_KEY" \\
  -H "Content-Type: application/json" \\
  -d '{
    "model": "z-image-turbo-int8",
    "prompt": "YOUR PROMPT HERE",
    "negative_prompt": "",
    "width": 1024,
    "height": 1024,
    "steps": 8
  }'
The API returns a request_id. Poll /request-status/{id} until status flips to done – typically under 10 seconds for 1024×1024 at 8 steps.
Images start at $0.00340 each. The $5 free credit you get on signup covers thousands of generations – enough to test hundreds of prompt variations before spending a dollar.
The deAPI Playground lets you test every prompt from this guide without writing code. Select Z-Image Turbo INT8, paste a prompt, hit generate.
One more thing worth trying: deAPI’s built-in Prompt Enhancement endpoint. Feed it “cat on a rooftop at sunset” and it returns a camera-ready prompt with lighting, composition, and style already structured. Especially useful when you know WHAT you want but don’t want to manually build the full 6-part formula every time.