
AI Product Photos via API: Clean Catalog Shots vs Styled Scenes
Small online stores rarely hire a photographer for every new product. The first photo usually comes from a phone, taken wherever the item happened to be standing, and before it can go on a marketplace listing or a shop page, the background has to go. A photo editor handles that for one image. For a catalog of a few hundred products, or for an app that does it for sellers, you need an AI product photo API.
This guide covers two ways to do it on deAPI. Path A cuts the product out with Ben2 and keeps it exactly as photographed, down to the pixel. Path B hands the whole photo to an image editor, which rewrites the background and redraws the product along with it. Both come with code and the price of every call.
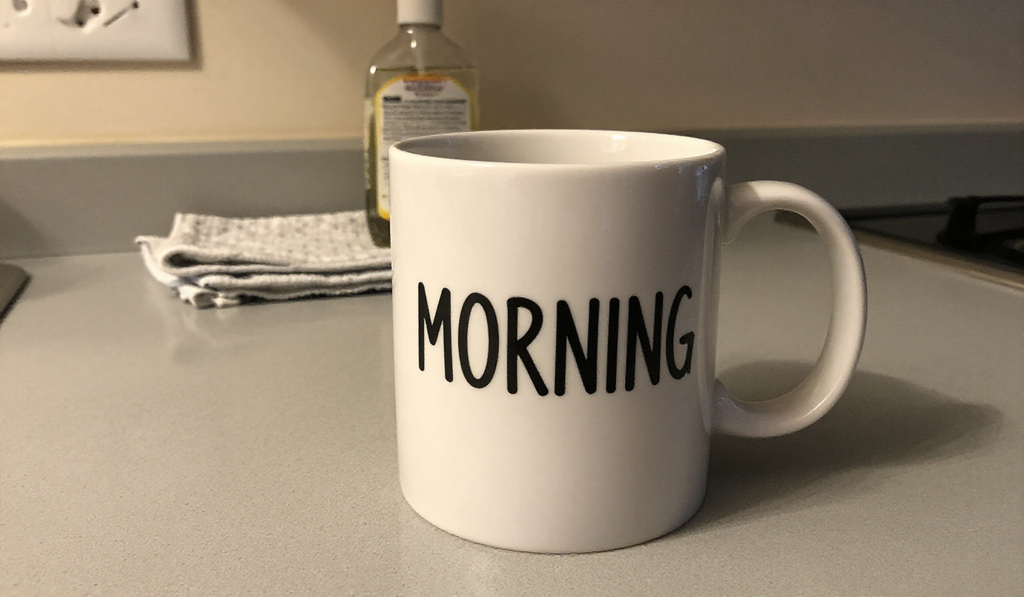
To test both, we staged exactly that kind of photo: a white mug with MORNING printed on the side, shot on a phone on a speckled kitchen counter, with a dish towel, a bottle of dish soap and a wall socket in the frame. Path A put the mug on pure white, and Path B moved it to an oak table in morning light. Which one you need depends on where the image is going.
Which path do you need
| Path A: catalog shot | Path B: styled scene | |
|---|---|---|
| Calls | Ben2, then RealESRGAN x4 | An image editor, then RealESRGAN x4 |
| Product pixels | Identical to your photo | Redrawn by the model |
| Background | Anything you can draw in code | Anything you can describe in a prompt |
| Cost per image | about $0.0024 | $0.009 to $0.047, depending on the editor |
| Good for | Marketplace listings and catalogs, where the item has to match what ships | Social posts, banners, landing pages |
Take Path A when a buyer will compare the product that arrives against your photo, and Path B when the image only has to set a mood.
Path A: a catalog shot that leaves the product untouched
Path A uses two model calls and a few lines of Pillow in between.
Step 1: cut the product out with Ben2
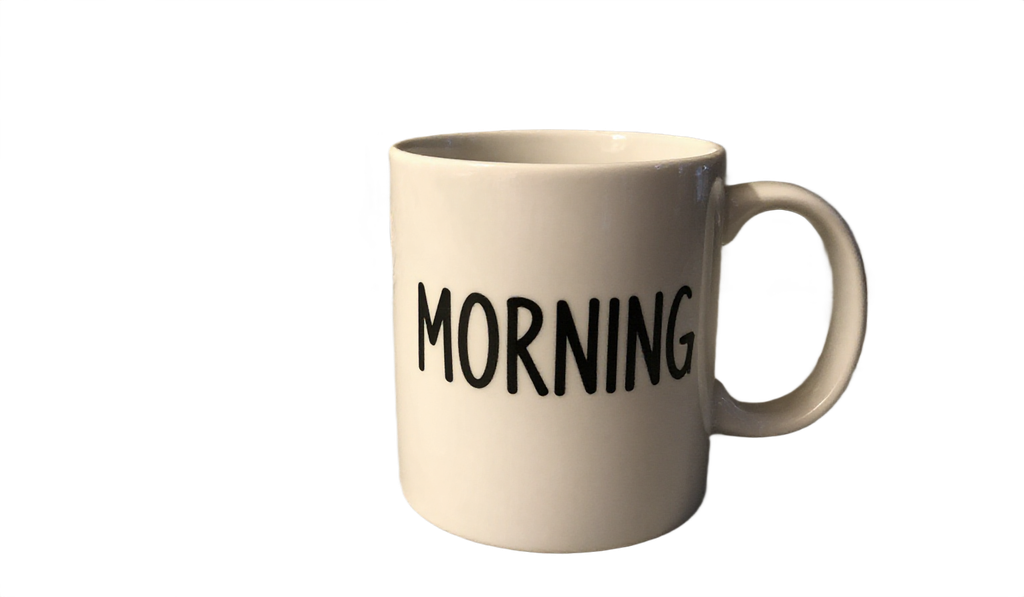
Ben2 takes the image and returns a PNG with an alpha channel at the same dimensions. Cutting our 1536×896 photo cost $0.00038. The Ben2 background removal guide covers the model in depth, including why you should upload the largest version you have, up to 2048 px per side.
We compared the cutout to the original pixel by pixel, and every pixel of the mug came back identical. Ben2 writes transparency and leaves colour alone, so the product in your catalog matches the one you photographed.
Step 2: add the background in code
Pillow composites the cutout onto any solid colour in milliseconds, so the white background costs nothing:
from PIL import Image

cutout = Image.open("cutout.png").convert("RGBA")
white = Image.new("RGBA", cutout.size, (255, 255, 255, 255))
Image.alpha_composite(white, cutout).convert("RGB").save("catalog.png")
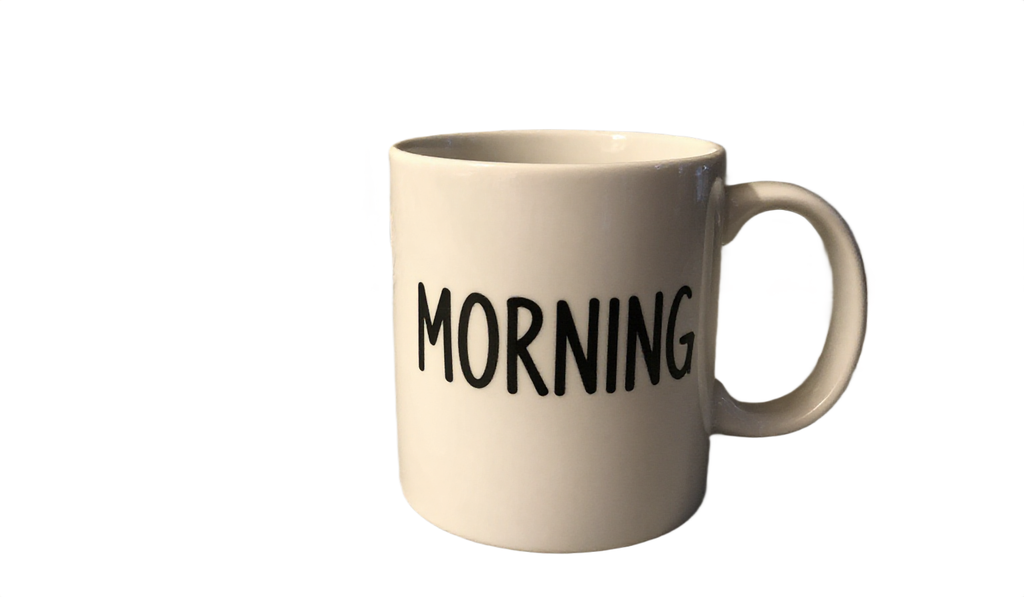
Ben2 removes the contact shadow along with the background, so the base of the mug stands on flat white. If your listing needs a shadow, you will have to paint one in.
Step 3: upscale last, after the background is flat
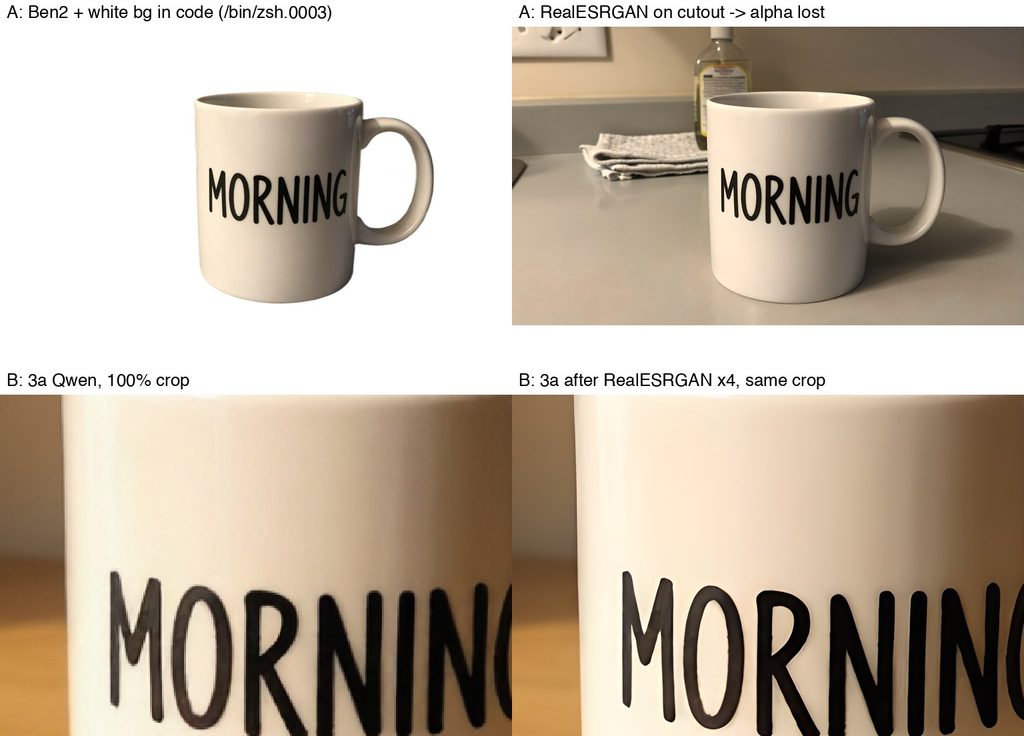
Our first attempt ran RealESRGAN x4 on the transparent cutout and returned a 6144×3584 image with the whole kitchen back in the frame.
A transparent PNG still stores colour data under every transparent pixel, and in Ben2’s case that data is your original photo. RealESRGAN returns an RGB image without the alpha channel, so the hidden kitchen reappears. The jpg variant in results_alt_formats fails the same way, as the Ben2 guide warns.
So flatten the background first and upscale after. RealESRGAN x4 on the 1536×896 white-background image cost $0.00205 and returned 6144×3584.
When the source photo is small, the Ben2 guide recommends the opposite order: upscale first, then cut. Ben2 accepts up to 2048 px per side, so upscaling 4x before the cutout only works for sources of about 512 px or less.
Path A totals about $0.0024 per image, so the $5 in free credit covers roughly 2,000 catalog shots.
Path B: a styled scene from an image editor
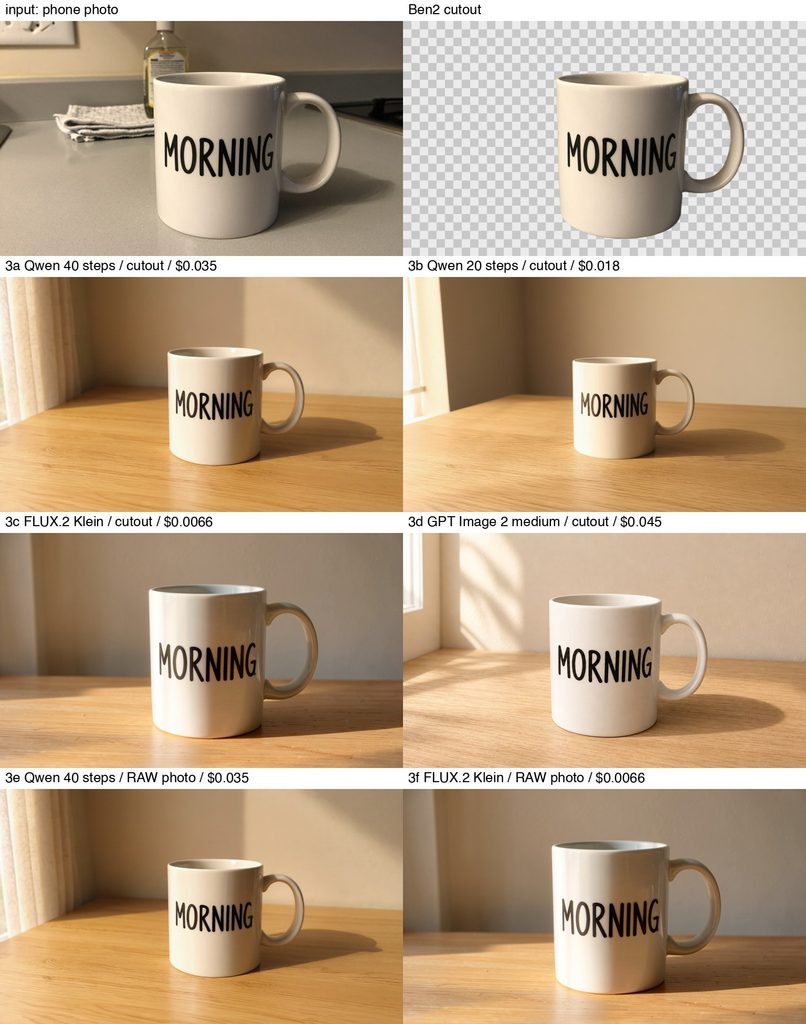
For a styled scene, send the raw photo straight to an image editor, which replaces the surroundings on its own. We ran Qwen Image Edit Plus and FLUX.2 Klein on both the raw kitchen photo and the Ben2 cutout, and the raw-photo versions came back as clean as the cutout versions, with the kitchen clutter gone.
Every editor got the same prompt:
Place the mug on a light oak tabletop against a soft beige wall. Warm morning window light falls from the left, and the mug casts a soft contact shadow on the wood beneath its base.
How the editors compared
| Model | Settings | Price | Output size | What we saw |
|---|---|---|---|---|
| Qwen Image Edit Plus | 40 steps | $0.0348 | 1344×768 | Natural contact shadow, warm window light |
| Qwen Image Edit Plus | 20 steps | $0.0179 | 1344×768 | Close to the 40-step result, slightly darker corner |
| FLUX.2 Klein | 4 steps | $0.0066 | 1536×896 | Weak contact shadow, the mug looks placed on the table |
| GPT Image 2 | quality medium | $0.0451 | 1536×896 | Strongest shadow, window light falling across the table |
The MORNING lettering came back legible and correctly spelled in every run.
Qwen sets its own output size. We sent 1536×896 without width or height and received 1344×768, and the model’s specs in GET /api/v2/models list no custom output size. FLUX.2 Klein and GPT Image 2 took the width and height we asked for.
Qwen’s price scales with its step count, and twenty steps cost half as much as forty. On this mug the difference was hard to spot, so test your own product at 20 before you run a catalog at 40.
GPT Image 2 prices are quoted as estimates. The price endpoint returned $0.061 for our request, and the finished job charged $0.045. The final amount is in the job response. GPT Image 2 runs in the Experimental tier and is available on paid accounts only.
Write the prompt for the model
One shared prompt kept this comparison fair. In production, write each prompt the way that model’s guide recommends, because the guides are also where you learn to keep the product intact.
The Qwen Image Edit Plus prompting guide recommends opening with a preservation clause, because naming what to protect first anchors the product. Rewritten that way, our prompt would read:
Keep the mug exactly as in the original, with the same shape, handle, glaze and MORNING lettering. Replace only the background and surface: place it on a light oak tabletop against a soft beige wall, with warm morning window light from the left and a soft contact shadow beneath its base.
FLUX.2 Klein accepts up to three input images. The FLUX.2 Klein prompting guide shows a product-plus-scene pattern, where the product photo goes in as the first reference, a photo of the setting as the second, and the prompt describes how to combine them.
Upscale the result
The upscale is the same call as in Path A. The 40-step Qwen output went from 1344×768 to 5376×3072 for $0.0016. Editors return opaque images, so the alpha problem from Path A doesn’t come up here.
Check the product before it goes live
An editor redraws the product together with the scene. We compared the mug in the Klein and GPT Image 2 outputs, which share the original’s dimensions, against the source photo, and fewer than one pixel in a thousand matched. Part of that gap comes from the mug shifting slightly in the frame, so the number proves the editor redraws the product without saying how visible the changes are.
The lettering survived every run in this test. A fine logo or an exact brand colour might not, so check them on every image before it reaches a store page. When the product has to be exact, use Path A.
The code
One helper submits a job and polls for the result. Each path is then a short function on top of it.
import os
import time
from io import BytesIO

import requests
from PIL import Image

API = "<https://api.deapi.ai/api/v2>"
HEADERS = {
    "Authorization": f"Bearer {os.environ['DEAPI_API_KEY']}",
    "Accept": "application/json",
}

def run(endpoint, image_path, **fields):
    with open(image_path, "rb") as f:
        r = requests.post(f"{API}/{endpoint}", headers=HEADERS, data=fields, files={"image": f})
    r.raise_for_status()
    request_id = r.json()["data"]["request_id"]
    while True:
        job = requests.get(f"{API}/jobs/{request_id}", headers=HEADERS).json()["data"]
        if job["status"] == "done":
            return Image.open(BytesIO(requests.get(job["result_url"]).content))
        if job["status"] == "error":
            raise RuntimeError(job["error_reason"])
        time.sleep(2)

def catalog_shot(photo, out, background=(255, 255, 255)):
    cutout = run("images/background-removals", photo, model="Ben2").convert("RGBA")
    flat = Image.new("RGBA", cutout.size, background + (255,))
    Image.alpha_composite(flat, cutout).convert("RGB").save("flat.png")
    # Flatten before upscaling: RealESRGAN drops the alpha channel.
    run("images/upscales", "flat.png", model="RealESRGAN_x4").save(out)

def styled_scene(photo, prompt, out, **editor):
    run("images/edits", photo, prompt=prompt, seed=42, **editor).save("scene.png")
    run("images/upscales", "scene.png", model="RealESRGAN_x4").save(out)

PROMPT = "Keep the mug exactly as in the original ..."

catalog_shot("mug.png", "mug_catalog.png")
styled_scene("mug.png", PROMPT, "mug_scene.png", model="QwenImageEdit_Plus_NF4", steps=20)
# FLUX.2 Klein: model="Flux_2_Klein_4B_BF16", steps=4, width=1536, height=896
# GPT Image 2:  model="gpt-image-2", quality="medium", width=1536, height=896
catalog_shot takes the image from result_url, which keeps the alpha channel. For batches of hundreds, pass a webhook_url with each job instead of polling, as shown in the Ben2 guide.
What it costs
Prices for a 1536×896 input, from deAPI price endpoints and job receipts in September 2026:
| Workflow | Per image | Images on the $5 free credit |
|---|---|---|
| Path A: Ben2 + white background + RealESRGAN x4 | $0.0024 | about 2,000 |
| Path B: FLUX.2 Klein + RealESRGAN x4 | $0.0086 | about 580 |
| Path B: Qwen Image Edit Plus, 20 steps + RealESRGAN x4 | $0.0195 | about 250 |
| Path B: Qwen Image Edit Plus, 40 steps + RealESRGAN x4 | $0.0364 | about 135 |
| Path B: GPT Image 2, medium + RealESRGAN x4 | $0.0472 | paid accounts only |
In Path B, the editor makes up 77 to 96 percent of the bill, so the choice of editor and its step count moves the price far more than the upscale does.
Start with the cutout
One Ben2 cutout costs a fraction of a cent, which makes it the cheapest place to test your own product photos. A new account comes with $5 in credit, enough for about 2,000 catalog shots from this guide. Get your API key.